Cotton swab painting is taking the art world by storm. This simple technique creates stunning results that rival traditional brush work. Whether you’re a beginner or experienced artist, these 16 professional methods will transform your artwork.
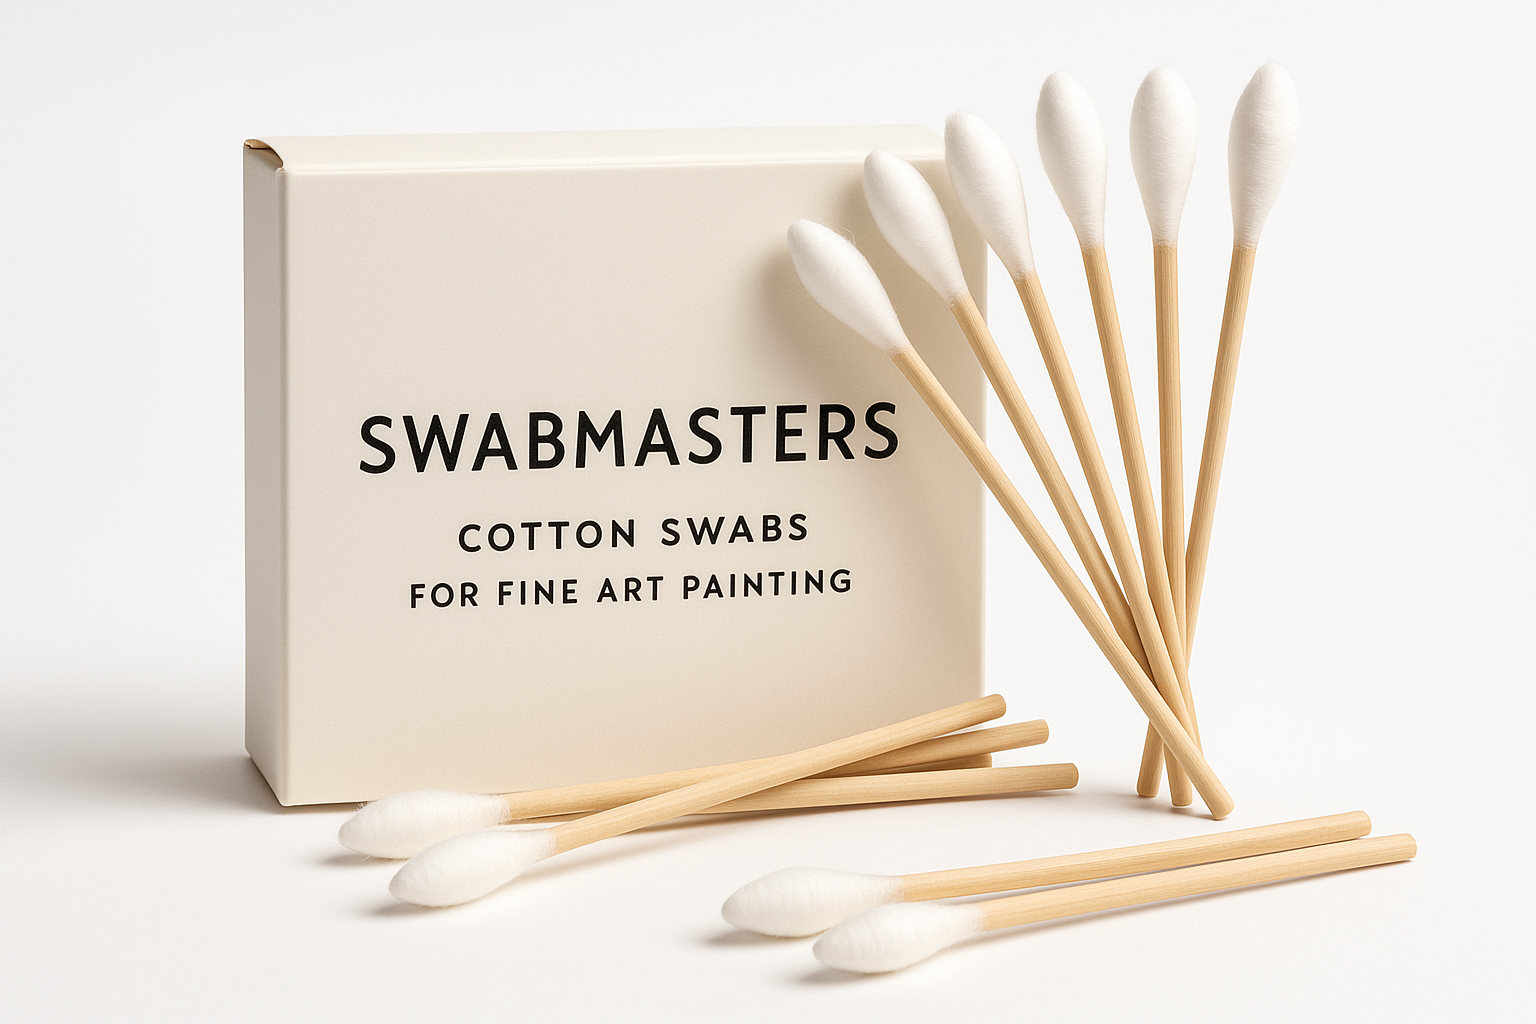
Professional-grade SWABMASTERS cotton swabs designed specifically for fine art applications
What Makes Cotton Swab Painting Special?
Cotton swab painting offers unique advantages over traditional brushes. The soft cotton tips create distinctive textures that brushes cannot achieve. Each dab produces perfect dots and organic patterns. This technique works with watercolors, acrylics, and mixed media.
Professional artists now use cotton swabs for fine art pieces. Museums display cotton swab paintings alongside traditional works. The technique bridges the gap between accessibility and sophistication.
Essential Materials for Professional Results
Choosing the Right Cotton Swabs
Not all cotton swabs work the same for painting. SWABMASTERS cotton swabs deliver superior results for fine art applications. These professional-grade swabs feature:
- Dense cotton tips that hold more paint
- Sturdy wooden stems that won’t bend
- Consistent tip shapes for uniform marks
- Lint-free cotton that won’t shed
Economy cotton swabs often fall apart during painting. Professional artists invest in quality tools. SWABMASTERS swabs maintain their shape through multiple paint applications.
Paint Selection
Soft body acrylic paints work best with cotton swabs. These paints have the perfect consistency for cotton absorption. Watercolors also produce excellent results when properly diluted.
Avoid thick, heavy-body paints. They don’t absorb well into cotton fibers. Thin paints create smoother application and better color blending.
Paper and Canvas Choices
Hot-pressed watercolor paper provides the ideal surface. The smooth texture allows cotton swabs to glide easily. Canvas boards work well for acrylic techniques. Avoid rough textures that catch cotton fibers.
Paper weight matters for professional results. Use 190-300gsm paper for watercolors. Lighter papers buckle when wet. Heavier papers stay flat during painting.
Fundamental Cotton Swab Techniques
Basic Dabbing Method
The foundation of cotton swab painting starts with proper dabbing technique. Load the cotton tip with paint by pressing gently into your palette. Too much pressure creates messy application.
Proper cotton swab grip and dabbing technique for professional results
Hold the swab vertically for maximum coverage. Angle it for smaller marks. Pressure controls dot size and intensity. Light touches create soft effects. Firm pressure produces bold marks.
Bundling Technique
Professional artists bundle multiple cotton swabs together. Wrap rubber bands around 3-5 swabs. This creates larger coverage areas and interesting textures.
Different bundle sizes produce varied effects:
- 2-3 swabs: Fine detail work
- 4-5 swabs: Medium coverage
- 6+ swabs: Large area filling
Make several bundles before starting. Keep them organized by size. This prevents interruptions during painting sessions.
Pressure Variation
Mastering pressure control separates amateur from professional results. Light pressure creates transparent effects. Medium pressure builds color intensity. Heavy pressure produces saturated marks.
Practice pressure scales on scrap paper. Start light and gradually increase pressure. Notice how colors change with different pressures. This control becomes instinctive with practice.
The 16 Professional Cotton Swab Methods
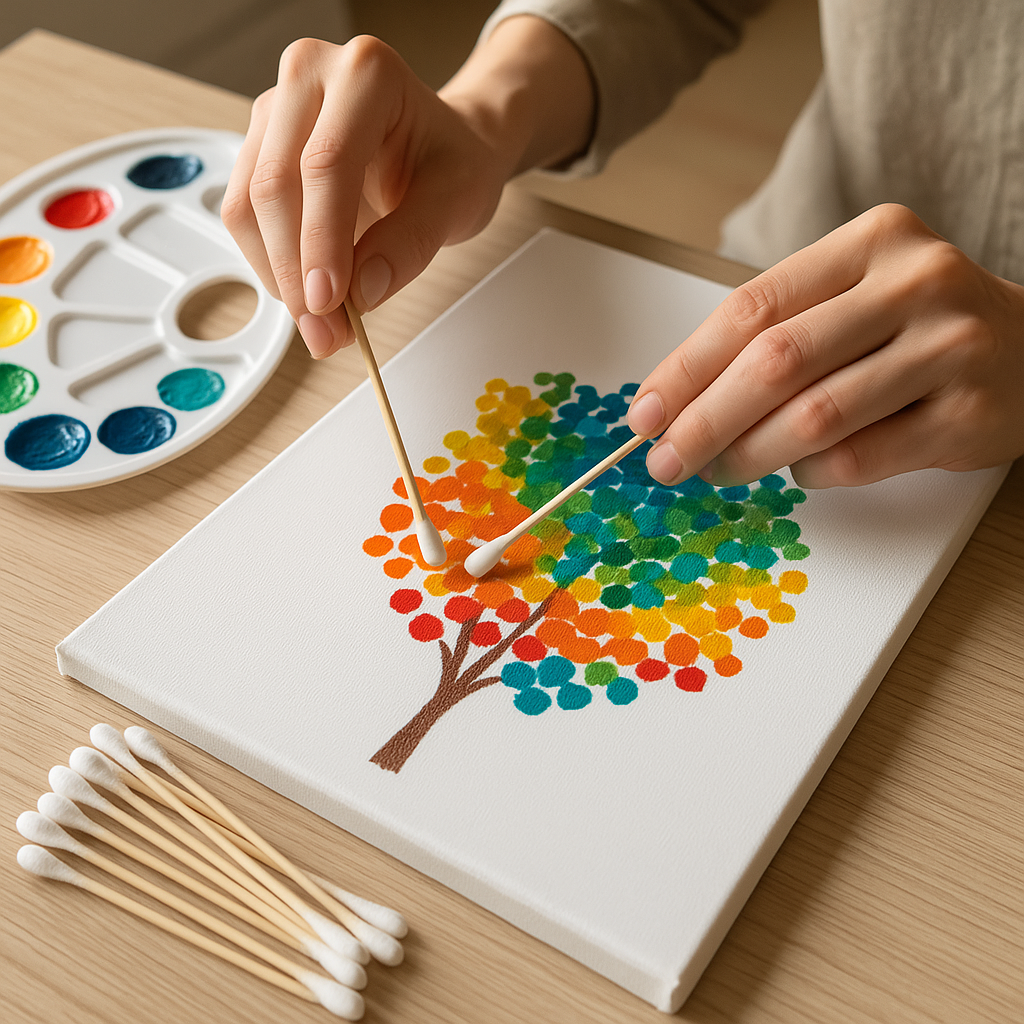
Method 1: Pointillism Technique
Pointillism creates images through small, distinct dots of color. Cotton swabs excel at this technique. Each dab produces perfect circular dots. Colors blend optically when viewed from distance.

Professional pointillism flower painting created entirely with cotton swab dots
Start with light colors as your base. Add darker tones gradually. Keep dots close but not touching. This creates vibration between colors. SWABMASTERS swabs maintain consistent dot sizes throughout your painting.
Professional tip: Use separate swabs for each color. This prevents muddy mixing. Clean swabs between colors for pure tones.
Method 2: Wet-on-Wet Blending
This watercolor technique creates soft, flowing effects. Apply wet paint to wet paper or wet paint areas. Cotton swabs control the blending better than brushes.
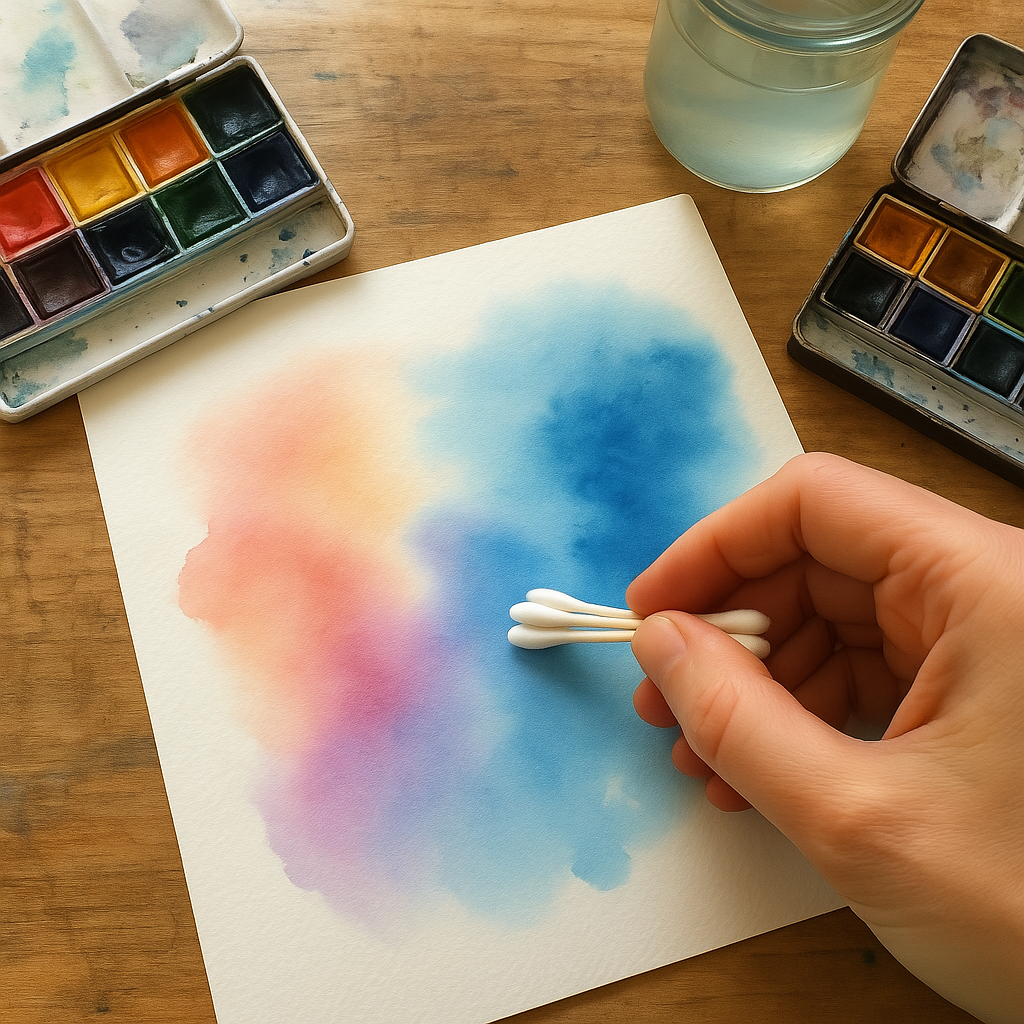
Soft watercolor blending technique demonstrating natural color flow with cotton swabs
Load your swab with diluted paint. Touch it to wet areas on your paper. The paint spreads naturally. Guide the flow with gentle swab movements. This technique works perfectly for skies and water scenes.
Timing is crucial for wet-on-wet success. Paper should be damp, not soaking. Too much water creates uncontrolled spreading. Too little prevents proper blending.
Method 3: Dry Brush Effect
Create textured, broken color effects with minimal paint. Load your cotton swab lightly. Remove excess paint on paper towels. Apply with quick, light touches.
This technique mimics dry brush painting. It’s perfect for tree bark, rock textures, and fabric details. The cotton fibers catch on paper texture, creating natural breaks in color.
Practice on different paper textures. Rough papers enhance the effect. Smooth papers require more pressure for texture.
Method 4: Stippling Technique
Stippling builds up color through repeated small marks. Unlike pointillism, stippling marks can vary in size and density. This creates rich, textured surfaces.
Hold your swab perpendicular to the paper. Make quick, light taps. Vary the pressure for different mark sizes. Build up areas gradually. Dense stippling creates dark values. Sparse stippling suggests lighter tones.
This technique works excellently for foliage, clouds, and animal fur. The organic randomness of stippling mimics natural textures.
Method 5: Gradient Creation
Cotton swabs excel at creating smooth color transitions. Start with your darkest color at one end. Gradually lighten by adding white or water. Blend with clean, damp swabs.
Work quickly while paint remains workable. Use overlapping strokes for smooth transitions. Clean your swab frequently to avoid muddy colors. This technique creates professional-looking skies and backgrounds.
SWABMASTERS swabs hold enough paint for longer gradient work. Their consistent absorption prevents streaky results.
Method 6: Texture Rolling
Roll cotton swabs across your surface for unique textures. This technique creates effects impossible with brushes. Load your swab with paint. Roll it across the paper while applying gentle pressure.
Vary the rolling speed for different effects. Fast rolling creates fine textures. Slow rolling produces broader marks. This technique works well for water ripples, grass textures, and fabric patterns.
Method 7: Lifting Technique
Remove paint while it’s still wet using clean, damp cotton swabs. This creates highlights and corrections. It’s especially effective with watercolors.
Blot gently to lift paint. Don’t scrub, as this damages paper. Work quickly before paint sets. This technique creates cloud formations, light reflections, and soft edges.
Keep clean swabs ready for lifting. Change them frequently as they become saturated with paint.
Method 8: Color Layering
Build rich colors through transparent layers. Apply thin washes with cotton swabs. Let each layer dry completely before adding the next. This creates depth and luminosity.
Start with light, warm colors. Add cooler, darker tones in subsequent layers. Each layer should be visible through the next. This technique creates complex color relationships.
Patience is key for successful layering. Rushing leads to muddy results. Plan your color sequence before starting.
Method 9: Negative Space Painting
Paint around shapes rather than painting the shapes themselves. Cotton swabs work perfectly for this technique. Their precision allows detailed negative space work.
Mask your positive shapes with tape or masking fluid. Paint the background with cotton swabs. Remove masks to reveal crisp edges. This technique creates dramatic contrast and focus.
Plan your composition carefully. Negative space painting requires forethought. The unpainted areas become as important as painted ones.
Method 10: Scumbling Technique
Apply broken color over existing dry paint. Load your cotton swab lightly. Drag it across the surface with irregular pressure. This creates optical color mixing.
The underlying color shows through the scumbled layer. This creates vibrant, complex color effects. It’s perfect for suggesting textures like stone, bark, or weathered surfaces.
Use complementary colors for vibrant effects. Similar colors create subtle variations. Experiment with different color combinations.
Method 11: Impasto Effects
Create thick paint textures using cotton swabs with heavy-body acrylics. Load swabs generously with paint. Apply with firm pressure to build up texture.
This technique adds dimension to your paintings. The cotton fibers create unique texture patterns. It works well for flower petals, tree bark, and fabric details.
Work quickly with impasto techniques. Heavy paints dry fast. Have your colors ready before starting.
Method 12: Atmospheric Perspective
Create depth through color and value changes. Use cotton swabs to apply progressively lighter, cooler colors for distant objects. Warmer, darker colors advance toward the viewer.
This technique requires careful color planning. Mix your color series before painting. Apply background colors first. Add foreground details last.
Cotton swabs excel at creating soft, atmospheric effects. Their gentle application prevents harsh edges that destroy atmospheric illusion.
Method 13: Broken Color Technique
Apply pure colors side by side without mixing. The eye blends the colors optically. This creates more vibrant effects than physical color mixing.
Use separate cotton swabs for each color. Place colors close together but don’t overlap. View your painting from different distances to see the optical mixing effect.
This technique works especially well for impressionistic styles. It captures the feeling of light and movement.
Method 14: Underpainting Method
Establish your composition with monochromatic cotton swab work. This creates a solid foundation for color layers. Use burnt umber or ultramarine blue for warm or cool underpaintings.
Focus on values rather than colors in your underpainting. Establish light and shadow patterns. This guides your color application later.
Let underpaintings dry completely before adding color. The underpainting should show through subsequent layers subtly.
Method 15: Glazing Technique
Apply transparent color layers over dry paint. Dilute your colors significantly for glazing. Cotton swabs apply glazes evenly without disturbing underlying layers.
Glazing modifies colors without covering them completely. It creates luminous, jewel-like effects. This technique requires patience but produces stunning results.
Use glazing to unify color schemes. A warm glaze over a cool painting creates harmony. Cool glazes calm warm paintings.
Method 16: Mixed Media Integration
Combine cotton swab techniques with other media. Use swabs with pastels, colored pencils, or markers. This creates rich, complex artworks.
Apply base colors with cotton swabs. Add details with other media. The soft cotton swab base provides perfect foundation for harder media.
Experiment with different media combinations. Each combination creates unique effects. Document successful combinations for future reference.
Professional Tips for Success
Color Management
Professional cotton swab painting requires careful color management. Organize your palette before starting. Group warm and cool colors separately. This prevents accidental muddy mixing.
Use a limited palette for cohesive results. Three to five colors create more harmony than many colors. Master these combinations before expanding your palette.
SWABMASTERS cotton swabs help maintain color purity. Their dense cotton tips hold paint well without dripping. This prevents unwanted color contamination.
Timing and Workflow
Plan your painting sequence carefully. Work from light to dark in most cases. Complete background areas before adding foreground details. This prevents smudging and maintains clean edges.
Keep multiple swabs ready for each color. This prevents delays during painting. Organize them by color family for quick access.
Work in sections when painting large areas. Complete each section before moving to the next. This maintains consistent paint application and prevents drying issues.
Surface Preparation
Proper surface preparation ensures professional results. Stretch watercolor paper if using heavy water applications. Tape edges to prevent buckling.
Prime canvas surfaces for acrylic work. This prevents paint absorption and maintains color intensity. Use appropriate primers for your chosen medium.
Test your cotton swab techniques on sample surfaces first. Different papers and canvases respond differently to cotton swab application.
Maintenance and Care
Clean cotton swabs between colors using clean water or appropriate solvents. Dirty swabs create muddy colors and poor results.
Replace swabs when cotton tips become frayed or saturated. Fresh swabs maintain consistent application quality.
Store unused swabs in clean, dry containers. Dust and debris affect paint application quality.
Common Mistakes and Solutions
Problem: Muddy Colors
Cause: Using dirty swabs or mixing too many colors.
Solution: Use separate swabs for each color. Clean swabs frequently. Limit your color palette.
Problem: Uneven Coverage
Cause: Inconsistent pressure or paint loading.
Solution: Practice pressure control. Load swabs consistently. Use SWABMASTERS swabs for uniform results.
Problem: Cotton Fibers on Painting
Cause: Low-quality cotton swabs or excessive pressure.
Solution: Use professional-grade swabs. Apply gentle pressure. Replace worn swabs promptly.
Problem: Paint Won’t Blend
Cause: Paint too thick or surface too dry.
Solution: Dilute paint appropriately. Keep surfaces slightly damp for blending. Work quickly while paint remains workable.
Problem: Harsh Edges
Cause: Too much pressure or wrong swab angle.
Solution: Use lighter pressure. Hold swabs at slight angles. Blend edges while paint is wet.
Advanced Professional Techniques
Creating Realistic Textures
Cotton swabs excel at creating natural textures. Study real textures closely. Notice how light affects surface appearance. Replicate these effects with varied cotton swab techniques.
For tree bark, use stippling with brown tones. Add highlights with dry brush technique. Create depth with darker values in crevices.
For water surfaces, use horizontal rolling motions. Vary pressure for different wave effects. Add reflections with vertical dabbing motions.
Atmospheric Effects
Master atmospheric perspective for realistic landscapes. Use cotton swabs to create soft, hazy effects in distant areas. Apply paint lightly for transparent effects.
Layer cool, light colors for distant mountains. Use warmer, darker colors for foreground elements. This creates convincing depth illusion.
Portrait Applications
Cotton swabs work excellently for portrait painting. Use them for soft skin tones and subtle modeling. The gentle application prevents harsh lines.
Build skin tones gradually with thin layers. Use warm undertones as base colors. Add cooler tones for shadows. Blend carefully for smooth transitions.
Color Theory for Cotton Swab Painting
Understanding Color Relationships
Successful cotton swab painting requires solid color theory knowledge. Complementary colors create vibrant contrasts. Analogous colors produce harmonious effects.
Use warm colors to advance elements toward the viewer. Cool colors recede into the background. This principle creates depth in your paintings.
Mixing Colors Optically
Cotton swab techniques excel at optical color mixing. Place pure colors side by side rather than mixing them physically. The eye blends these colors naturally.
This technique creates more vibrant results than physical mixing. It’s especially effective for impressionistic styles and natural subjects.
Value Relationships
Value (lightness and darkness) is more important than color for successful paintings. Establish strong value patterns with your cotton swab work.
Squint at your subject to see value relationships clearly. Ignore color temporarily. Focus on light and shadow patterns. This creates strong compositional foundations.
Building Your Cotton Swab Art Practice
Daily Exercises
Develop cotton swab skills through daily practice. Spend 15-20 minutes daily on technique exercises. Focus on one technique per session.
Practice basic dabbing motions until they become automatic. Work on pressure control exercises. Master color loading techniques.
Keep a practice journal. Document successful techniques and color combinations. Note what works and what doesn’t.
Progressive Skill Development
Start with simple subjects like flowers or fruits. Master basic techniques before attempting complex compositions.
Progress to landscapes and still life subjects. These provide opportunities to practice multiple techniques in single paintings.
Advanced students can attempt portraits and figure work. These subjects require mastery of all cotton swab techniques.
Professional Development
Join cotton swab painting communities online. Share your work and learn from others. Participate in challenges and group projects.
Study master paintings to understand technique applications. Analyze how professional artists use cotton swab effects.
Consider teaching others once you develop proficiency. Teaching reinforces your own learning and builds artistic community.
Conclusion
Cotton swab painting offers unlimited creative possibilities. These 16 professional methods provide foundation for artistic exploration. Master these techniques through consistent practice and experimentation.
SWABMASTERS cotton swabs ensure professional results for serious artists. Their quality construction supports advanced techniques and detailed work.
Remember that technique serves artistic vision. Use these methods to express your unique artistic voice. Let cotton swab painting become your pathway to creative fulfillment.
Start your cotton swab painting journey today. Choose quality materials, practice regularly, and embrace the unique possibilities this medium offers. Your artistic development awaits.
For premium cotton swabs designed specifically for fine art applications, visit SWABMASTERS.COM – your trusted partner in professional cotton swab painting.